Basics
Getting started
Navigate to Window -> Quick Model -> Quick Model to open the editor window.
Terms
Library/global asset - an asset that has been added to a library. Stored in a central place where they can be accessed by any Unity project.
Project asset - an asset that has been added to the project by importing it. Only visible in the same project.
Folders
Quick Model automatically creates some folders to your Unity-project when you first install it. Here they are:
Assets/QuickModel - These are the assets you have added to your project from libraries.
Global assets are saved to a different place where they can accessed by all Unity-projects. For example in Windows they can found under the Unity-directory:
%appdata%\Unity\QuickModelGlobal - These are all of your assets, you have added to a library.
Add asset to a library
Drag and drop an asset from file system or project window to the Quick Model window.

Then fill in metadata about the asset in the add new asset window and click Create. Ensure you have filled all the required fields (marked with stars). You can also skip this step by selecting library and category beforehand and then drop assets while holding ctrl-key.
Note: It is highly recommended to use prefabs as they contain everything related to that asset in one package. Files are saved as a Unity package with all necessary depencies like textures, materials, etc.
Preview an asset
Double click on an asset or right-click it and select View. Then you should see a window pop up with asset preview and metadata associated with it.
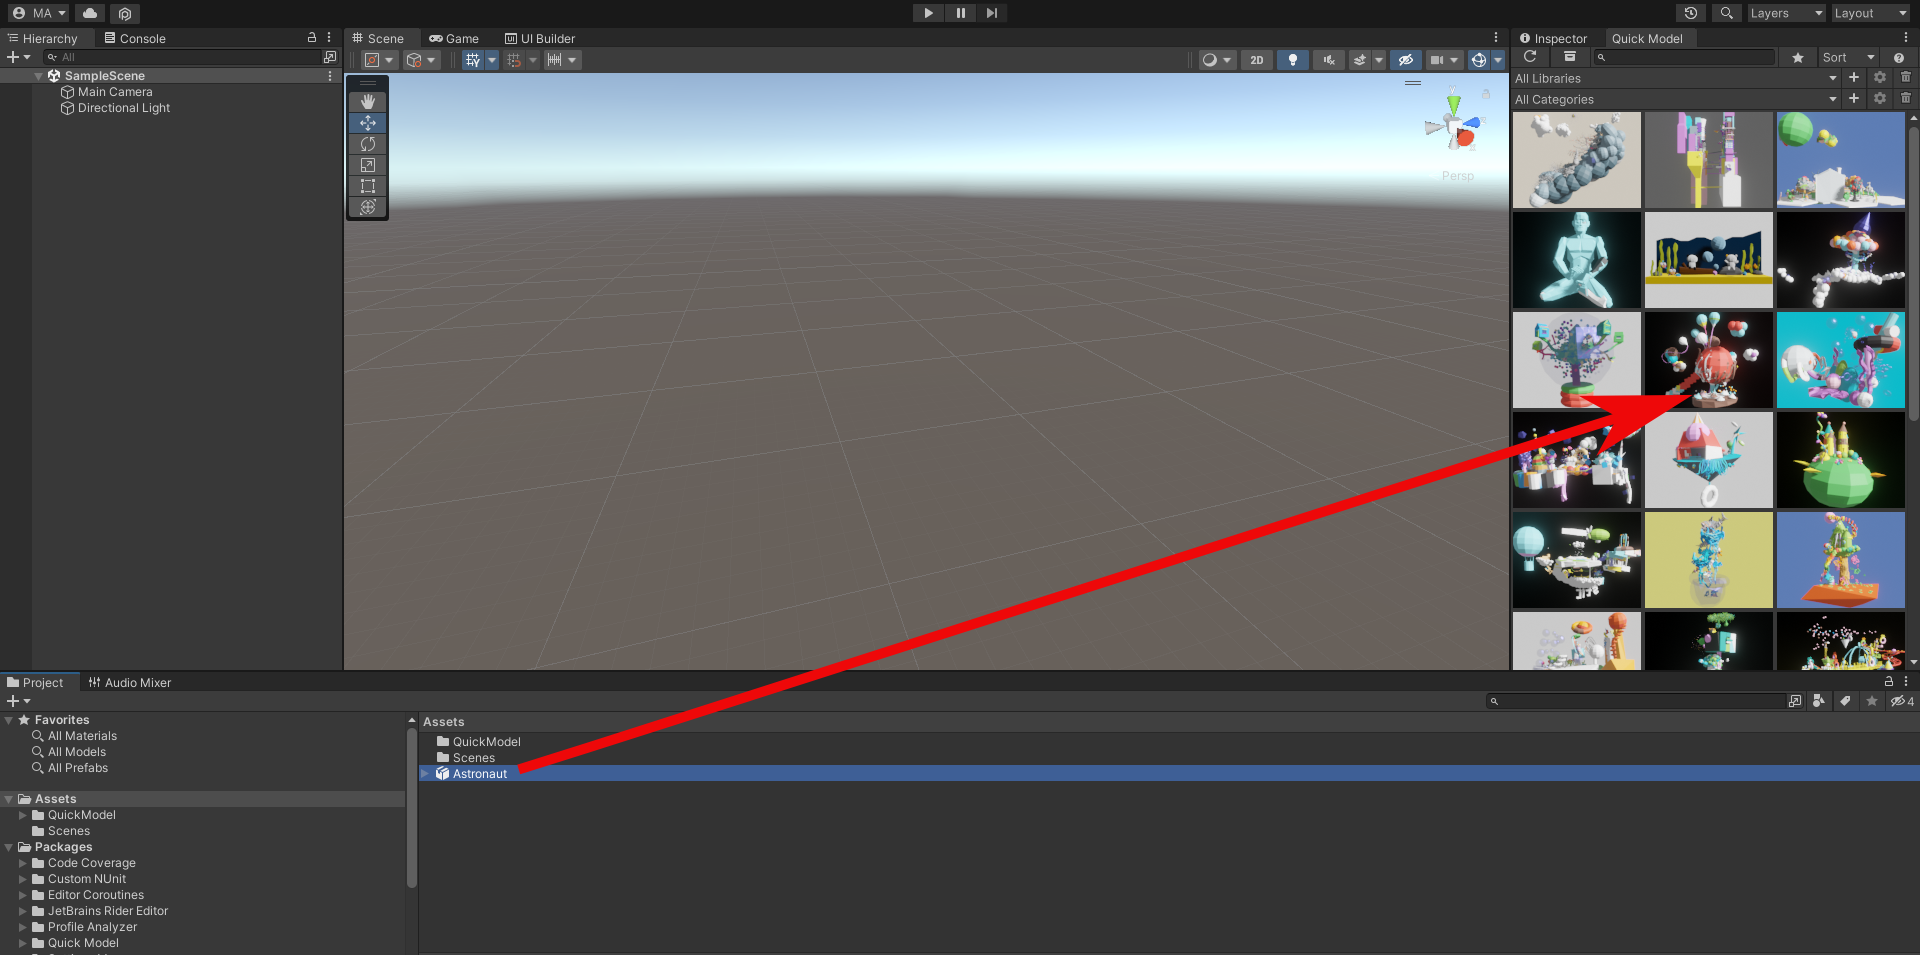
Place an asset to a scene
You can select a game object from the scene you want to place new assets under, then click the asset you want to place in the scene by clicking on an asset in the Quick Model window.
Press shift + WASD keys to rotate, U to toggle normal snapping or ESC-key to clear the asset selection.
You can also toggle ground snapping by pressing G-key. By holding CTRL you can activate incremental snapping. Grid snapping can also be enabled from the menu. If nothing happens when you press buttons, please make sure you have the scene view focused by clicking on it.
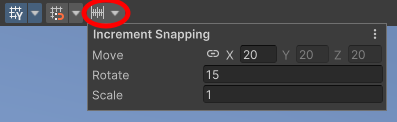
Snap settings
You can reassign snapping hotkeys from Unity's settings. All snapping options can be found from the Edit -> Quick Model menu. Grid snapping can be enabled and disabled from Unity's snap settings. Move tool needs to be selected and tool handle rotation set to global in order for grid snapping to work properly.
Remove an asset from a library
Right-click an asset and select Remove on the context menu.
Note: Project asset and imported files are not removed this way. To remove a project asset you can use the project manager.
Add an asset to the project
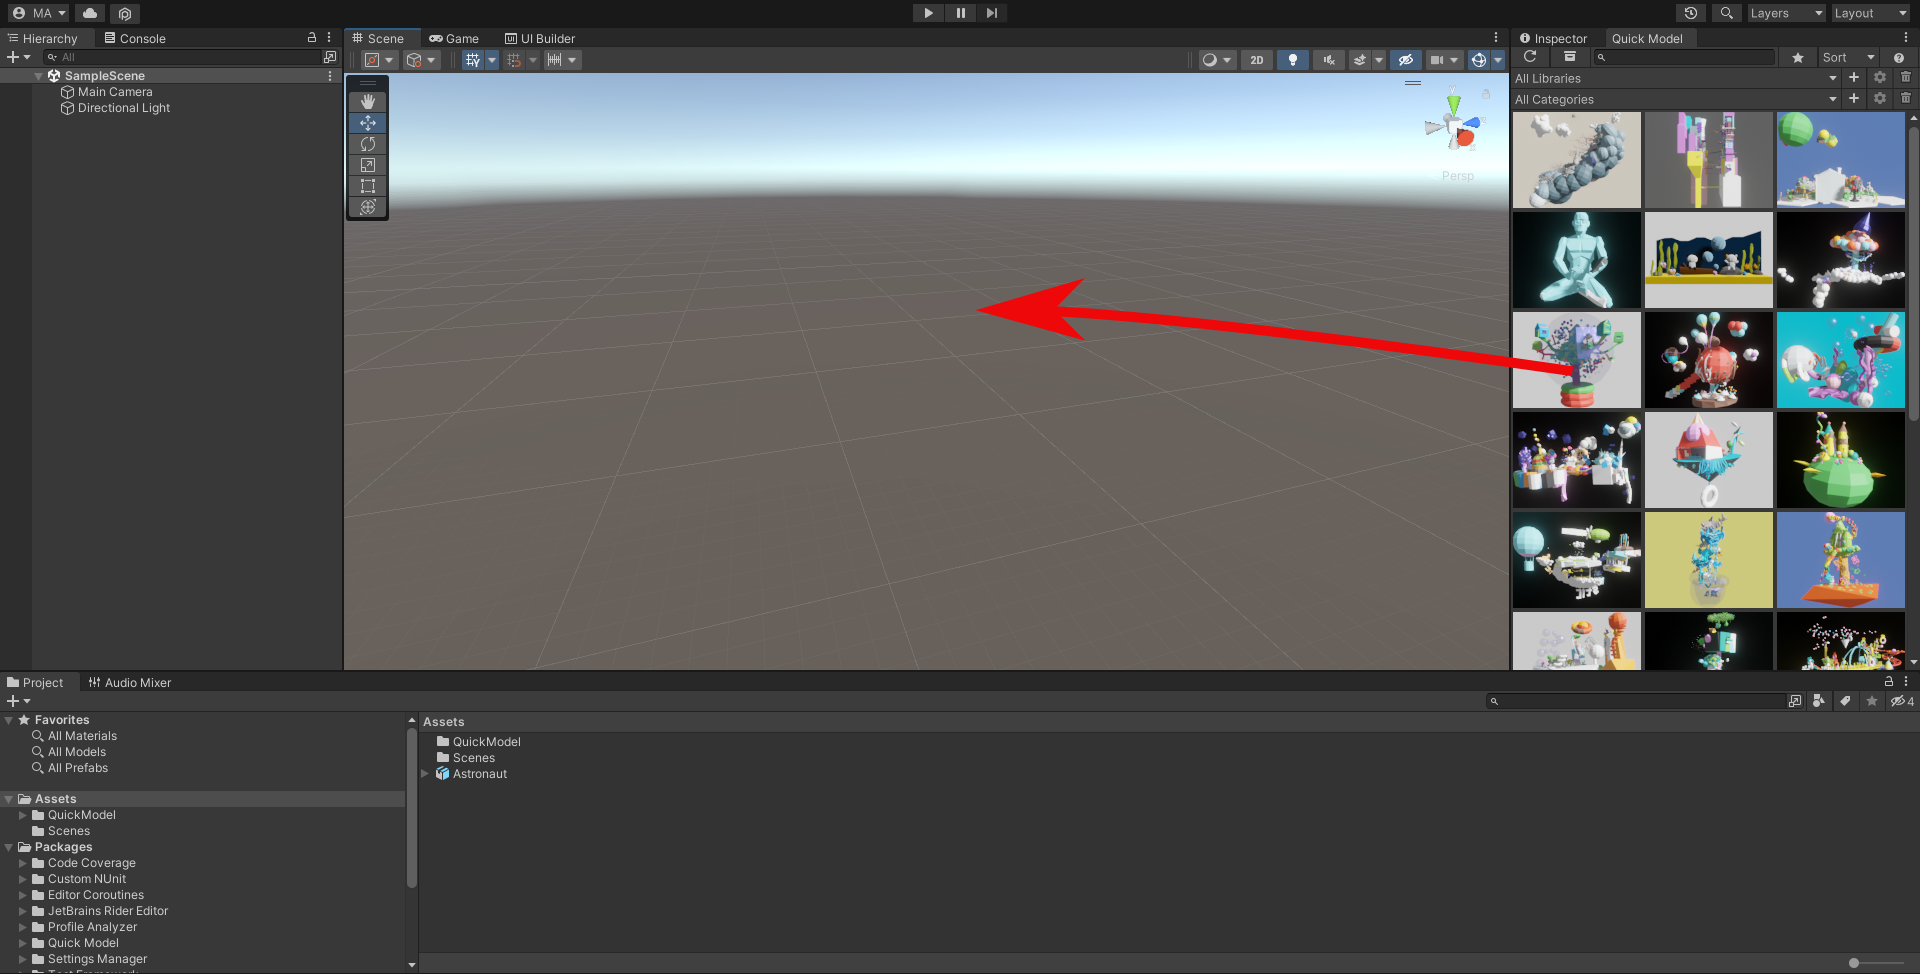
Drag and drop an asset from Quick Model dock to the scene or file system to add it to the project.
Remove an asset from the project
Open project manager, right-click on the asset you want to remove and select Remove. You can also select multiple assets with a left-click and then right-click to open context menu to remove all.
Import an asset
Right-click an asset and select Import All from the context menu. You can also import only some assets by selecting Import... from the context menu.
Mass import assets
Open Project Manager, select assets you would like to import from the not imported list and right click to select import all.
Update an asset file
Right-click on an asset and select Show Main Asset File from the context menu. Assets are stored in a Unity package format. Change the file to a new one and reimport the asset in Unity.